| The following is based on the Soviet campaign of Red Alert 3 and might contradict canon. |
The Shrike and the Thorn is the first mission in the Soviet campaign of Red Alert 3.[1]
Background[]

Japanese forces in Leningrad
The use of the Soviet Temporal Displacement Device had not turned out as expected, and to the shock of Premier Cherdenko had perhaps even tilted the playing field against the favor of the Soviet Union. Besides their old arch-nemesis in the form of the Allied Nations, the Soviets faced a new threat in the form of the Empire of the Rising Sun, created by Cherdenko's disastrous attempt at Time Travel. Across the length and breadth of the Motherland, Imperial forces rampaged almost unopposed and half of the Soviet armies were hard-pressed to fight them off. Amongst the many cities facing destruction at the point of the Empire's sword was Leningrad, the beating heart of the Union.
Realizing how disastrous the fall of the city would be to the morale of the Soviet people, Premier Cherdenko ordered the immediate defense of the city, despite the proclamations of General Krukov that the Commander assigned was too inexperienced, and that Leningrad was indefensible. With the city already besieged, the Commander and his forces were deployed swiftly to reinforce the faltering defenses.
Force composition[]
| “ | Good to be working with you Commander. - Natasha |
” |
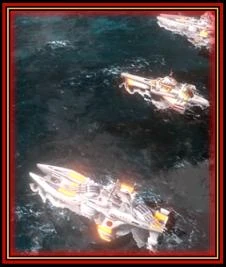
The Empire of the Rising Sun has spared no expense in their quest to crush the beating heart of Soviet resistance, thus the force that assailed Leningrad was quite large. Thousands of Imperial infantry had been called up to storm the barricades, while these were supported with a full regiment of Tsunami Tanks and squadrons of Chopper VX gunships. In reserve, the Imperial commander at the city, Kenji had positioned eight mighty Shogun Battleships to offer long-range bombardment support, along with more armour and air support.
| “ | Greetings from the Empire of the Rising Sun, I am commander Kenji Tenzai and it will be a great pleasure for me to dismantle your cherished city - Kenji Tenzai preparing his attack on the Peter and Paul Fortress |
” |


Natasha, the Soviet commando helped in the defense of Leningrad
Compared to the forces of the invaders, the Soviet defenders were pitifully few. The Soviets had precious few assets to call upon for the defense of Leningrad, as all of their other forces had been set elsewhere to hold the advancing Empire at bay. As such, the city was protected by several companies worth of infantry (Conscripts and Flak Troopers), which were ferried to the battlefield in Bullfrog transports. While the ranks of the defenders were relatively few and without much in the way of armour support, they were joined by the legendary commando-sniper Natasha, while Soviet bombers would engage in constant fire missions.
New additions[]
Events[]
The Imperials began their attack on Leningrad swiftly and by the time Soviet reinforcements had arrived under the command of Oleg and the unnamed Soviet Commander, much of the city was in ruins and the Empire was advancing steadily towards the central Fortress that dominated the city. With the aid of Natasha, the Soviets quickly eliminated a blockading Imperial force and secured the fortress, establishing defenses and rallying the local troops before the main attack occurred. Here, the worth of Bullfrog transports was proven once more as the Soviets used them to transport reinforcements swiftly through the city's canals.
When the arrogant Imperial Commander Kenji Tenzai arrived, the Soviets were ready for him and from the barricades at the Fortress threw back every attack sent against them. The fortified positions of the Soviets gave them a distinct advantage over the attackers and soon dozens of wrecked Tsunami Tanks littered the battlefield, further slowing the Imperials. A diversionary attack upon the Soviet Heritage Museum was swiftly countered by Natasha and some brave volunteers, preserving the Union's greatest cultural artifacts. Facing a funding shortage, Leningrad's treasury was turned over to the Soviet defenders.
Finally, Kenji threw his Shogun Battleships forward, hoping to crush the Soviet defenses. The long range firepower of the Imperial Navy's greatest vessels caused extensive damage to the fortress and the Soviet barricades and, for a time, survival of the fortress was very much in doubt. Fortunately, the defenders held on long enough for Natasha to call down airstrikes upon the Battleships and the Soviet magnetic satellite, sending every one of them to the bottom of the canals (or hurtling into space). Without his artillery support and with casualties mounting, Kenji was forced to withdraw.
Aftermath[]
The successful defense of Leningrad was the first real success that the Soviet Union had against the Empire of the Rising Sun and the people took hope once more, seeing that these invaders from the east can be defeated. True as much of the city lay in ruins, but few of the Union's men lay dead, and the pride of their people had been spared. The Empire, meanwhile, saw this as merely a temporary setback, for a while they had lost many of their troops fighting that day, armies of the Rising Sun were nearly endless and the losses they had taken were minor, all things considered. The Soviet Union still faced a tough fight ahead...
Walkthrough[]
The opening sees Natasha is chased by 5 Imperial Warriors then eliminated by the fallen Kirov airship. Natasha is then launched from the city to the canals. The player starts out with Natasha. In Co-Op mode, the Co-Commander also gets five Conscripts to accompany her during the first phase of the mission. Use Natasha to kill the Imperial Warriors then a reminder will them that Natasha can airstrike the barricade at the fortress, then eliminate all of the Imperial infantry units within the fortress. The player then gets a Barracks and credits (the starting amount varying on the chosen difficulty; 6000 on Easy, 3000 in Medium and 1500 in Hard to train 5 Flak Troopers and later 5 Conscripts (which the player will gain an additional 1000 credits). If the player has no credits remaining, Leningrad's treasury will grant one final sum of credits to the player. The Imperial forces that attack the fortress includes Tsunami Tanks, Chopper VXs, Sudden Transports (with Tankbusters riding on them). Garrison the buildings near the fortress for added protection to fend off the imperial attacks. With Oleg remarks the attacks is really real. Then Dasha informs the commander about the Bonus objective to save the hermitage.
Later on, once the Bonus Objective to save the Hermitage is available, the player gets a Bullfrog to transport infantry and shoot down enemy aircraft. First, the player should use the Bullfrog to transport Natasha and some infantry across the canals to save the Hermitage. Upon completing, the objective, the player will gain additional funds to replenish their troops if needed, then must transport their troops back to the Fortress (via another Bullfrog) to face the final wave with 6 Shogun battleships sieging the fortress, which can be guarded by Mecha Tengus. As well as Kenji gloating the commander that no one will stand against the Shogun Battleships. Oleg then tells the player that he will defend the fortress to the last man while the player must use Natasha to remotely destroy the battleships. The player will also gain the use of Magnetic Satellite which can also remove the battleships, clearing the challenge. While defending the fortress, the player may need to be vary of Sudden Transports disguising themselves as the Bullfrog in attempt to slip past the player's troops. And after the mission, Kenji gloats that the attack is just only begun, while Dasha reminds the fortress is safe and the Premier will be pleased.
Trivia[]
- The premise of the mission is similar to the first mission of the Allied campaign in Command & Conquer: Red Alert 2 where the commander must utilize a hero unit to defend a monument on an island while repelling an invasion accompanied by naval forces.
- The difference in Lone Guardian is that the Statue of Liberty ends up destroyed by a V3 Rocket Launcher, whereas the Peter and Paul Fortress in this mission is not.
Videos[]
References[]
- ↑ Electronic Arts Los Angeles, Command & Conquer: Red Alert 3. Soviet mission 1: "The Shrike and the Thorn".