(New additions) Tag: Source edit |
No edit summary |
||
| Line 22: | Line 22: | ||
|{{Flag|Imperials|RA3}} [[Naomi Shirada]] |
|{{Flag|Imperials|RA3}} [[Naomi Shirada]] |
||
}} |
}} |
||
| − | |commanders2 = {{Flag|Allies|RA3}} |
+ | |commanders2 = {{Flag|Allies|RA3}} {{L|Tanya|character}} |
|forces1 = * Several regiments worth of infantry and armour deployed from the [[Black Tortoise]] |
|forces1 = * Several regiments worth of infantry and armour deployed from the [[Black Tortoise]] |
||
* Several Imperial warships |
* Several Imperial warships |
||
| Line 65: | Line 65: | ||
Next, they turned their attention to the last remaining units and destroyed them, clearing the way for a [[Sudden Transport|transport]] to drop off an engineer and capture the airfield control tower. The Allied forces fighting in Santa Monica were now cut off from all reinforcements and resupplying, enabling the Japanese to make greater gains against them. |
Next, they turned their attention to the last remaining units and destroyed them, clearing the way for a [[Sudden Transport|transport]] to drop off an engineer and capture the airfield control tower. The Allied forces fighting in Santa Monica were now cut off from all reinforcements and resupplying, enabling the Japanese to make greater gains against them. |
||
| − | With most of the defending Allies destroyed by this juncture, the remainder had rallied to the last propaganda center. |
+ | With most of the defending Allies destroyed by this juncture, the remainder had rallied to the last propaganda center. {{L|Tanya|Red Alert 3}} was spotted, and presumably killed in action, while defending the broadcast station. Using captured Allied War Factories, the Imperial commander constructed some [[Mirage Tank]]s, and used their cloaking shield to sneak up to the surviving Allied garrison and ambush them. This tactic proved fruitful and the final opposition was destroyed. |
== Aftermath == |
== Aftermath == |
||
Revision as of 18:55, 23 July 2022
| The following is based on the Imperial campaign of Red Alert 3 and might contradict canon. |
Rage of the Black Tortoise is the sixth Imperial mission of Red Alert 3.[1]
Background
The Allied failure to cripple the Black Tortoise and the loss of so many of their ships and sailors had left the Empire of the Rising Sun master of the Pacific Ocean. The way was now clear for an assault on the United States' West Coast.
Ever conscious of the power of propaganda, Emperor Yoshiro demanded the capture of Santa Monica, home of the world-influencing American media. If the broadcast centres of Santa Monica, Los Angeles and Hollywood itself could be taken, then the destruction of the Allies will would progress that much more smoothly.
Force composition
The Imperials almost have the full might of the Imperial Army at their side.
The Allies however had the full might of the Allied Air Force and Army. The Los Angeles International Airport provided some Century Bomber support and provided Apollo reinforcements.
New additions
Events

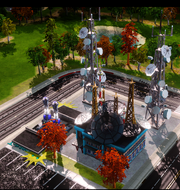
One of the Media Centers in Santa Monica
With the city up-close to the beaches, there was nearly no room for expansion. As such, the Imperial invasion force unleashed a bombardment from the Wave-Force Tri-Cannons of the Black Tortoise, which resulted in the destruction of many homes. With more ground to work on, the Imperial commanders began to expand their bases and deploy the Empire's brave warriors into the heart of the barbarian city.


The artillery cannon, hidden inside the Griffith Observatory
After a short siege of the city, the Imperial forces managed to break through, linking their forces, and overwhelming a small Allied base located within the city limits, as well as a second one on the coast between their two encampments. However, the Allies were far from beaten, and activated a powerful artillery emplacement hidden in the Griffith Observatory overlooking the entire city.
It was capable to shooting over nearly half the city, and the constant, brutal bombardment left the Imperial advance stalled in its tracks. Here, Imperial air power proved to be the solution, and after some heavy bombardment by Rocket Angels and Chopper-VX support, the Griffith Observatory artillery emplacement was destroyed.
In the meantime, the Allies had used their borrowed time well, and had set up further defenses around the broadcast studios, resulting in intense fighting between the two armies as they sought to bring them under their control. The use of Wave-Force Artillery units helped to break the back of the Allied static defenses and allow the Imperial troops to hit their forces directly, gaining control of several media outlets in this manner.
Seeing that strength alone would not guarantee victory, the unnamed Imperial Commander elected for a more devious strategy. To the south-east lay an airport where the Allies' continued to drop off reinforcements. Using a blitzkrieg method of warfare, the Imperial forces quickly delved deep into the enemy territory, destroying the local airfields and airplanes that were harassing them.
Next, they turned their attention to the last remaining units and destroyed them, clearing the way for a transport to drop off an engineer and capture the airfield control tower. The Allied forces fighting in Santa Monica were now cut off from all reinforcements and resupplying, enabling the Japanese to make greater gains against them.
With most of the defending Allies destroyed by this juncture, the remainder had rallied to the last propaganda center. Tanya was spotted, and presumably killed in action, while defending the broadcast station. Using captured Allied War Factories, the Imperial commander constructed some Mirage Tanks, and used their cloaking shield to sneak up to the surviving Allied garrison and ambush them. This tactic proved fruitful and the final opposition was destroyed.
Aftermath
The Empire now had control of the vast American propaganda and communication centers, and over the next few weeks, the American populace would be bombarded with the Empire's propaganda, weakening their resistance and allowing Naomi and the forces stationed on the Black Tortoise to make greater territorial gains as they conquered the American West Coast. She thanked her fellow Commander for his teamwork in bringing down the Allies, and wished him good luck in further endeavors with a respectful bow and saying destiny is in his favor.
The conquest of Santa Monica by the Empire shocked and horrified Allied leaders, and soon, they turned to a desperate alliance with the also-battered Soviets in hopes of turning back the Imperial menace. The Empire had won this battle, but in doing so, they unleashed a terrible turn of events that came close to bringing down the Empire of the Rising Sun once and for all...
Walkthrough
The player must use the fortresses Wave Force Tri-cannons to clear a landing zone for an MCV to arrive.
After the way is cleared the MCV will arrive so the player can build a base.
Beware of the allied air force and the mirage tanks that protect the Athena Cannons. Do not use Tengus in jet mode due to the apollo fighters will shoot them all down.
Capture the airport will slow the allies from using air power.
The player will also get to build the strongest and most accurate artillery unit in the game: The wave force artillery. Use it to destroy the defenses from a safe distance because the Tsunami tanks and the Chopper VXs are no match for both Spectrum towers and the Multigunner turrets.
Destroying the Cannon up in the upper right corner of the map will make things easier.
Capture the media centers and the mission is a win.
Trivia
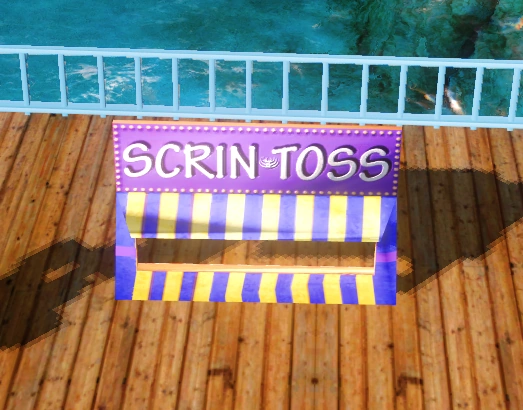
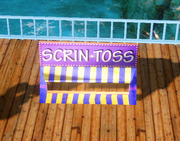
The "Scrin Toss" easter egg
- Once captured, the Media Centers can be heard playing traditional Japanese music.
- The EA Los Angeles building can be found near the player's base. It is considered an enemy target, and any Imperial units will automatically attack it. Humorously, its description states that destroying this studio could cause irreparable damage to the space-time continuum, referencing the fact that EALA developed Red Alert 3.
- The Com Towers near the Media Centers are reused Rushmore Com Towers from A Monument to Madness, and have the exact same description, mentioning how they are connected to the defensive network "here at Mt. Rushmore".
- The balloon stands at the amusement park are reused assets from Circus of Treachery, and the price signs are written in Russian.
- One of the stands at the amusement park has the words "Scrin Toss" as well as an inverted Scrin emblem at the front.
- When Suki informs the commander during the briefing is before the commander kills American Hollywood Actors, she asks a favor to get some autographs for her. Which is ironic considering the many movie actors are featured in the game.
Videos
References
- ↑ Electronic Arts Los Angeles, Command & Conquer: Red Alert 3. Imperial mission 6: "Rage of the Black Tortoise".