mNo edit summary |
No edit summary Tag: Visual edit |
||
| Line 1: | Line 1: | ||
| − | {{Games| |
+ | {{Games|RA2}} |
{{WarBox |
{{WarBox |
||
| − | |name = |
+ | |name = Lone Guardian |
| − | |prev = [[ |
+ | |prev = [[Boot Camp - Day 2]] |
| − | | |
+ | |next = [[Eagle Dawn]] |
| − | | |
+ | |image = RA2_Allied_M01_Start.png |
| − | |image = Tiberiumcost.png |
||
| − | |imgsize = 300px |
||
|imgdesc = |
|imgdesc = |
||
| − | |conflict = [[ |
+ | |conflict = [[Third World War (Red Alert 2)|Third World War]] |
| − | |date = |
+ | |date = 1972 |
| − | |place = |
+ | |place = [[New York City]], [[United States of America (Red Alert)|United States]] |
| + | |result = Allied victory |
||
| − | * [[Koula-Moutou]], [[Gabon]] |
||
| + | * Soviet offensive stalled |
||
| − | |result = Nod destroys village and prevents potential spread of infection thus ensuring the safety of [[Nod]] extraction workers |
||
| − | |side1 = {{Subfaction| |
+ | |side1 = {{Subfaction|US|RA2}} |
| − | |side2 = {{Subfaction| |
+ | |side2 = {{Subfaction|RU|RA2}} |
| ⚫ | |||
| − | |goal1 = * Destroy the infected village |
||
| ⚫ | |||
| − | * Eliminate all [[GDI]] forces |
||
| + | |forces1 = {{Flag|US|RA2}} [[Tanya (Red Alert 2)|Tanya]]<br />{{Flag|US|RA2}} [[Fort Bradley]] |
||
| − | |goal2 = * Protect the village |
||
| + | |forces2 = {{Flag|Russia|RA2}} Soviet supply base |
||
| − | * Prevent [[Nod]] from harvesting the nearby [[Tiberium]] field |
||
| + | |game = ''[[Command & Conquer: Red Alert 2|Red Alert 2]]'' |
||
| ⚫ | |||
| + | |objectives = |
||
| ⚫ | |||
| + | * Destroy all four Soviet [[Dreadnought (Red Alert 2)|Dreadnoughts]] |
||
| − | |forces1 = *[[Minigunner (Tiberian Dawn)|Minigunners]] |
||
| + | * Rendezvous with Fort Bradley |
||
| − | *[[Rocket soldier (Tiberian Dawn)|Rocket soldiers]] |
||
| + | * Destroy the Soviet Supply Base |
||
| − | *[[Flamethrower infantry (Tiberian Dawn)|Flamers]] |
||
| − | *[[Light tank (Tiberian Dawn)|Light Tanks]] |
||
| − | *[[Buggy (Tiberian Dawn)|Buggies]] |
||
| − | *[[Recon bike]]s |
||
| − | *[[Chinook]]s |
||
| − | |forces2 = *[[Minigunner (Tiberian Dawn)|Minigunners]] |
||
| − | *[[Grenadier (Tiberian Dawn)|Grenadiers]] |
||
| − | *[[Medium tank (Tiberian Dawn)|Medium Tanks]] |
||
| − | *[[Armoured Personnel Carrier (Tiberian Dawn)|APC]]s |
||
| − | *[[Humvee (Tiberian Dawn)|Humvees]] |
||
| − | *[[Guard tower]]s |
||
| − | *Armed civilians |
||
|notes = |
|notes = |
||
| + | |transcript = Transcript:Lone Guardian |
||
}} |
}} |
||
| + | {{quote|The Soviets have invaded. They outnumber us ten to one. You must assist special agent Tanya in New York. We are marshaling our forces as fast as we can, Commander, but we need time. A small American base, Fort Bradley, is in the New York area. If you can make contact, they may be able to assist in the defense of New York. Tanya will be moving through a chaotic battlefield. Keep your eye out for targets of opportunity and watch for new mission objectives.|Mission briefing}} |
||
| − | {{Q|The Brotherhood has located a huge field of Tiberium in the area. The nearby village has laid claim to the field. Eliminate the villagers, as to prevent any infection of our own workers. GDI forces are reported to be minimal, so elimination of them is of secondary importance.|Mission briefing}} |
||
| − | ''' |
+ | '''Operation: Lone Guardian''' is the first mission of the [[Allied]] campaign of ''[[Command & Conquer: Red Alert 2]]''.<ref name="RA2_Allied1">Westwood Pacific, ''[[Command & Conquer: Red Alert 2]]''. Allied mission 1: "Operation: Lone Guardian".</ref> |
| − | == |
+ | ==Background== |
| + | The Soviet invasion of the American mainland took the USA by surprise but not the European leaders. As Soviet invaders pour into the country from every conceivable direction, the Allied military desperately tried to defend itself from the aggressors. One of the key elements of the invasion was [[New York City]], hit especially hard due to its strong propaganda values. |
||
| − | The government of [[Gabon]] while it was one of the two or three African governments that initially declared in favour of [[Nod]] at the beginning of their [[Africa]]n Campaign; had following the fall of the more powerful neighbouring [[Nod]] aligned [[Cameroon]] to [[GDI]] forces, attempted to save itself by withdrawing from [[Nod]] and declaring itself neutral. But under pressure from the nearby [[GDI]] forces, [[Gabon]]'s government would soon declare itself [[GDI]]. |
||
| + | With most of the military commanders dead, only one was able to respond to the President's Lazarus Protocol, an emergency directive to be activated in the event of an invasion. Coming under the command of General [[Carville]], the Commander was placed in command of every man, woman and child in the Eastern United States and sent to New York City to blunt the Soviet invasion. |
||
| − | But large fields of [[Tiberium]] had grown unchecked in [[Gabon]] and [[Cameroon]], [[Kane]] had taken a personal interest in harvesting these fields. There was a problem however, in each of the countries a village had come down with [[Tiberium]] sickness. Believing [[Tiberium]] sickness to be contagious and fearing a regional epidemic that could infect [[Nod]] extraction workers, [[Seth]] sent some forces to 'take care' of the problem of these villages. |
||
| − | == |
+ | ==Force composition== |
| + | The Americans were caught off-guard by the invasion, and they only had a small force. Nevertheless, Several Legions of [[GI]]s were deployed to Liberty Island, and [[Fort Bradley]] was still standing. There were also three [[Grizzly Tank]]s nearby, but they had lost contact and were unable to get to Fort Bradley. Despite the small numbers, the Allies also had [[Tanya (RA2)|Special Agent Tanya]], giving them a major advantage. |
||
| − | [[Seth]] had taken a disliking to one of his subordinate commanders, whose successes against GDI were causing Kane to favour him, and who Seth now viewed as a competitor. In the mission briefing Seth intentionally lied, claiming that the villages were barely defended. In reality, they were in the vicinity of [[GDI]] bases which had been built to secure the area and protect some hospitals that the [[GDI]] had built to treat the infected. |
||
| + | Much of the Soviet invasion force was still on the way, and the Soviets were unable to deploy much of their navy, nor any tanks. However, they had four [[Dreadnought (Red Alert 2)|Dreadnoughts]] that they were planning to use to provide cover support. They also paradropped legions and legions of [[Conscripts]], commanded by a small supply base in the area. Stationed at the base were also a division of [[V3 Rocket Launcher|V3 Launchers]], inciting panic and wrecking the city. |
||
| − | However, it is ambiguous whether the Commander in question was sent to this battle or to a concurrent false flag operation in the Central African Republic. If the latter, it is unclear whether Seth attempted to deceive the other commanders. |
||
| + | ==Key units== |
||
| − | Regardless, the outcome was a clear Nod victory. Nod troops destroyed the village, the hospital and the [[GDI]] base. The infected villages were killed in the very hospital beds that the [[GDI]] had given them and just to make sure [[Nod]] forces had massacred even the apparently healthy villagers. |
||
| + | {| |
||
| + | |[[File:RA2_Tanya_Icons.png|link=Tanya (Red Alert 2)]] |
||
| + | |[[File:RA2_Engineer_Icons.png|link=Engineer (Red Alert 2)]] |
||
| + | |[[File:RA2_GI_Icons.png|link=GI]] |
||
| + | |} |
||
| − | == |
+ | ==Events== |
| + | ===Defending the Statue of Liberty=== |
||
| − | [[File:Battleforzaire.png|thumb|left|250px|With Gabon and Cameroon secure [[Nod]] forces were able to advance on [[Zaire]].]] |
||
| + | {{quote|The Soviet Navy is attacking the Statue of Liberty! We can't let them get away with that! Sir, is there anything you can do?|Lt. Eva Lee, to the Commander at the start of the mission}} |
||
| − | With the Commander truly becoming Kane's favourite at Seth's expense, Seth planned to dispose of him once and for all with a completely suicidal assault on the [[Pentagon]]. However, Kane executed him before this attack could be carried out. |
||
| + | The mission begins with [[Tanya (Red Alert 2)|Tanya]] emerging from her base camp. Once she sinks the four dreadnoughts and the [[Statue of Liberty]] is secured, it turns out it wasn't quite safe - A V3 Rocket Launcher brought it down with sustained fire (which was then promptly destroyed by Harriers), after which Premier [[Alexander Romanov]] of the Soviet Union and his allies have broadcasted a propaganda statement to American citizens, offering them the choice of either joining the Soviet Revolution, or continue to mourn their past with the ruins of Lady Liberty. |
||
| − | Having apparently stalled the threat of [[Tiberium]] sickness epidemics, [[Nod]] forces would create enormous [[Tiberium]] mining centres at [[Bertoua]] and Koula-Moutou. Enriched by these nearby huge [[Tiberium]] fields [[Nod]] forces would swiftly destroy the occupying [[GDI]] forces in [[Cameroon]] and [[Gabon]], restoring [[Nod]] rule over these countries. |
||
| + | ===Link up to Fort Bradley=== |
||
| ⚫ | |||
| + | Tanya is then ordered to link up with [[Fort Bradley]]. While going through the city, Soviet paratroopers drop in as part of the invasion force took place. Having located scattered Allied units, including deployed GIs and the Grizzly Tank trio, and fighting through numerous Soviet paratroopers, Tanya finally reached Fort Bradley. |
||
| − | * Late into the mission, the GDI may send {{L|Humvee|Tiberian Dawn}}s into the village and proceed to kill off villagers. |
||
| + | ===Destroying the supply base=== |
||
| − | {{Clear Left}} |
||
| + | An engineer repaired the only accessible bridge to the Soviets' hastily constructed supply base. Using forces from Fort Bradley, Tanya led her infantry across and announced their arrival to the Soviets by destroying the highly unstable oil barrels placed around the base. Bypassing the [[Sentry Gun (Red Alert 2)|Sentry Guns]], Tanya quickly made short work of the base, while the GIs took out the bombarding V3 Launchers and the [[Grizzly battle tank|Grizzlies]] taking care of the defences. In no time at all, the Allies had at last blunted the Soviet invasion of New York. |
||
| ⚫ | |||
| + | |||
| + | ==Walkthrough== |
||
| + | Since this is the first mission, it is very easy. First, sink the four dreadnoughts with Tanya. Then, enter Liberty Island and quickly kill all [[conscripts]]. Then, put Tanya at the Burger McKong car park, so she could destroy all Soviet paratroopers. Then, reach Fort Bradley and build a Barracks. Train a lot of GIs and an engineer. Use the engineer to repair the bridge, then carry out the rest of the assault with GIs. |
||
| + | |||
| + | ===Valuable assets=== |
||
| + | * Firepower and armor upgrade crates in parking lots at the upper-left corner of the map. |
||
| + | * Four additional bonus crates located south of said parking lots, located on a small pier and as such, accessible only by Tanya. |
||
| + | * Three experienced Grizzly tanks north of [[Fort Bradley]]. |
||
| + | * Multiple crates in the enemy base, including money crate. |
||
| + | |||
| + | ===Tips=== |
||
| + | * Statue of Liberty is scripted to withstand dreadnoughts' barrages, so there's no need to sink them hastily. Order Tanya to help the defending veteran GIs to repel conscript paratroopers is recommended since they can be useful to take out Soviet base. |
||
| + | * There's no way to protect Statue of Liberty from being destroyed by the V3 launcher, so sell the two [[Patriot Missile System (Red Alert 2)|Patriot Missile Systems]] for credits to assist later war efforts, unless you would rather watch them shoot down the Soviet cargo planes buzzing through the sky during the mission. |
||
| + | * If the Dreadnoughts escape (having attempted to proceed with the mission without destroying them), the mission will fail. |
||
| + | |||
| + | ==Aftermath== |
||
| + | {{Q|Your lightning counterattack blunted the Soviet invasion.|The mission debriefing when played faster than at par time}} |
||
| + | {{Q|You barely succeeded in holding back the Soviet advance.|The mission debriefing when played slower than at par time}} |
||
| + | |||
| + | The Allies lightning counterattack blunted the Soviet invasion, protecting the East Coast. However, it was only a minor victory. The Soviets were still churning in from Mexico and the Pacific. Furthermore, the destruction of the Statue of Liberty was a major blow to the Americans. It was only a matter of time until [[Hail to the Chief|Soviets reached]] [[Washington, D.C. (Red Alert)|Washington D.C.]] |
||
| + | |||
| ⚫ | |||
| + | |||
| + | *In the [[Blight on the Big Apple|last Soviet mission]] of ''[[Red Alert 3]]'', Tanya was seen destroying Dreadnoughts attacking the Statue of Liberty, just before the player builds their base. |
||
| + | *The damage the Dreadnoughts’ missiles deal to the Statue of Liberty has been greatly reduced for the purposes of the mission, but not quite completely. If the player leaves the Dreadnoughts long enough then they will destroy the Statue, Eva will announce that a critical structure has been lost and the mission will fail (even though the Statue is ultimately destroyed by the V3 anyway). This is demonstrated here: https://youtu.be/PbEKEtHO6JQ |
||
| + | |||
| + | ==Gallery== |
||
| + | <gallery orientation="square" widths="210"> |
||
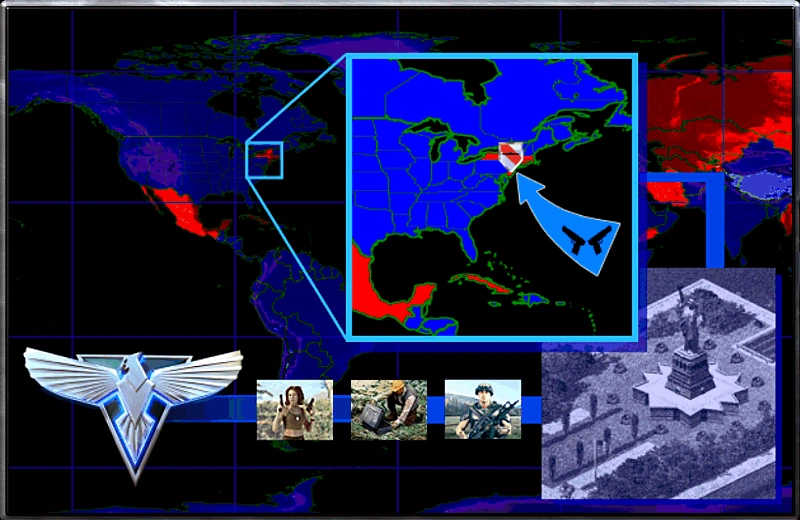
| + | File:Ls800a01.png|Loading screen |
||
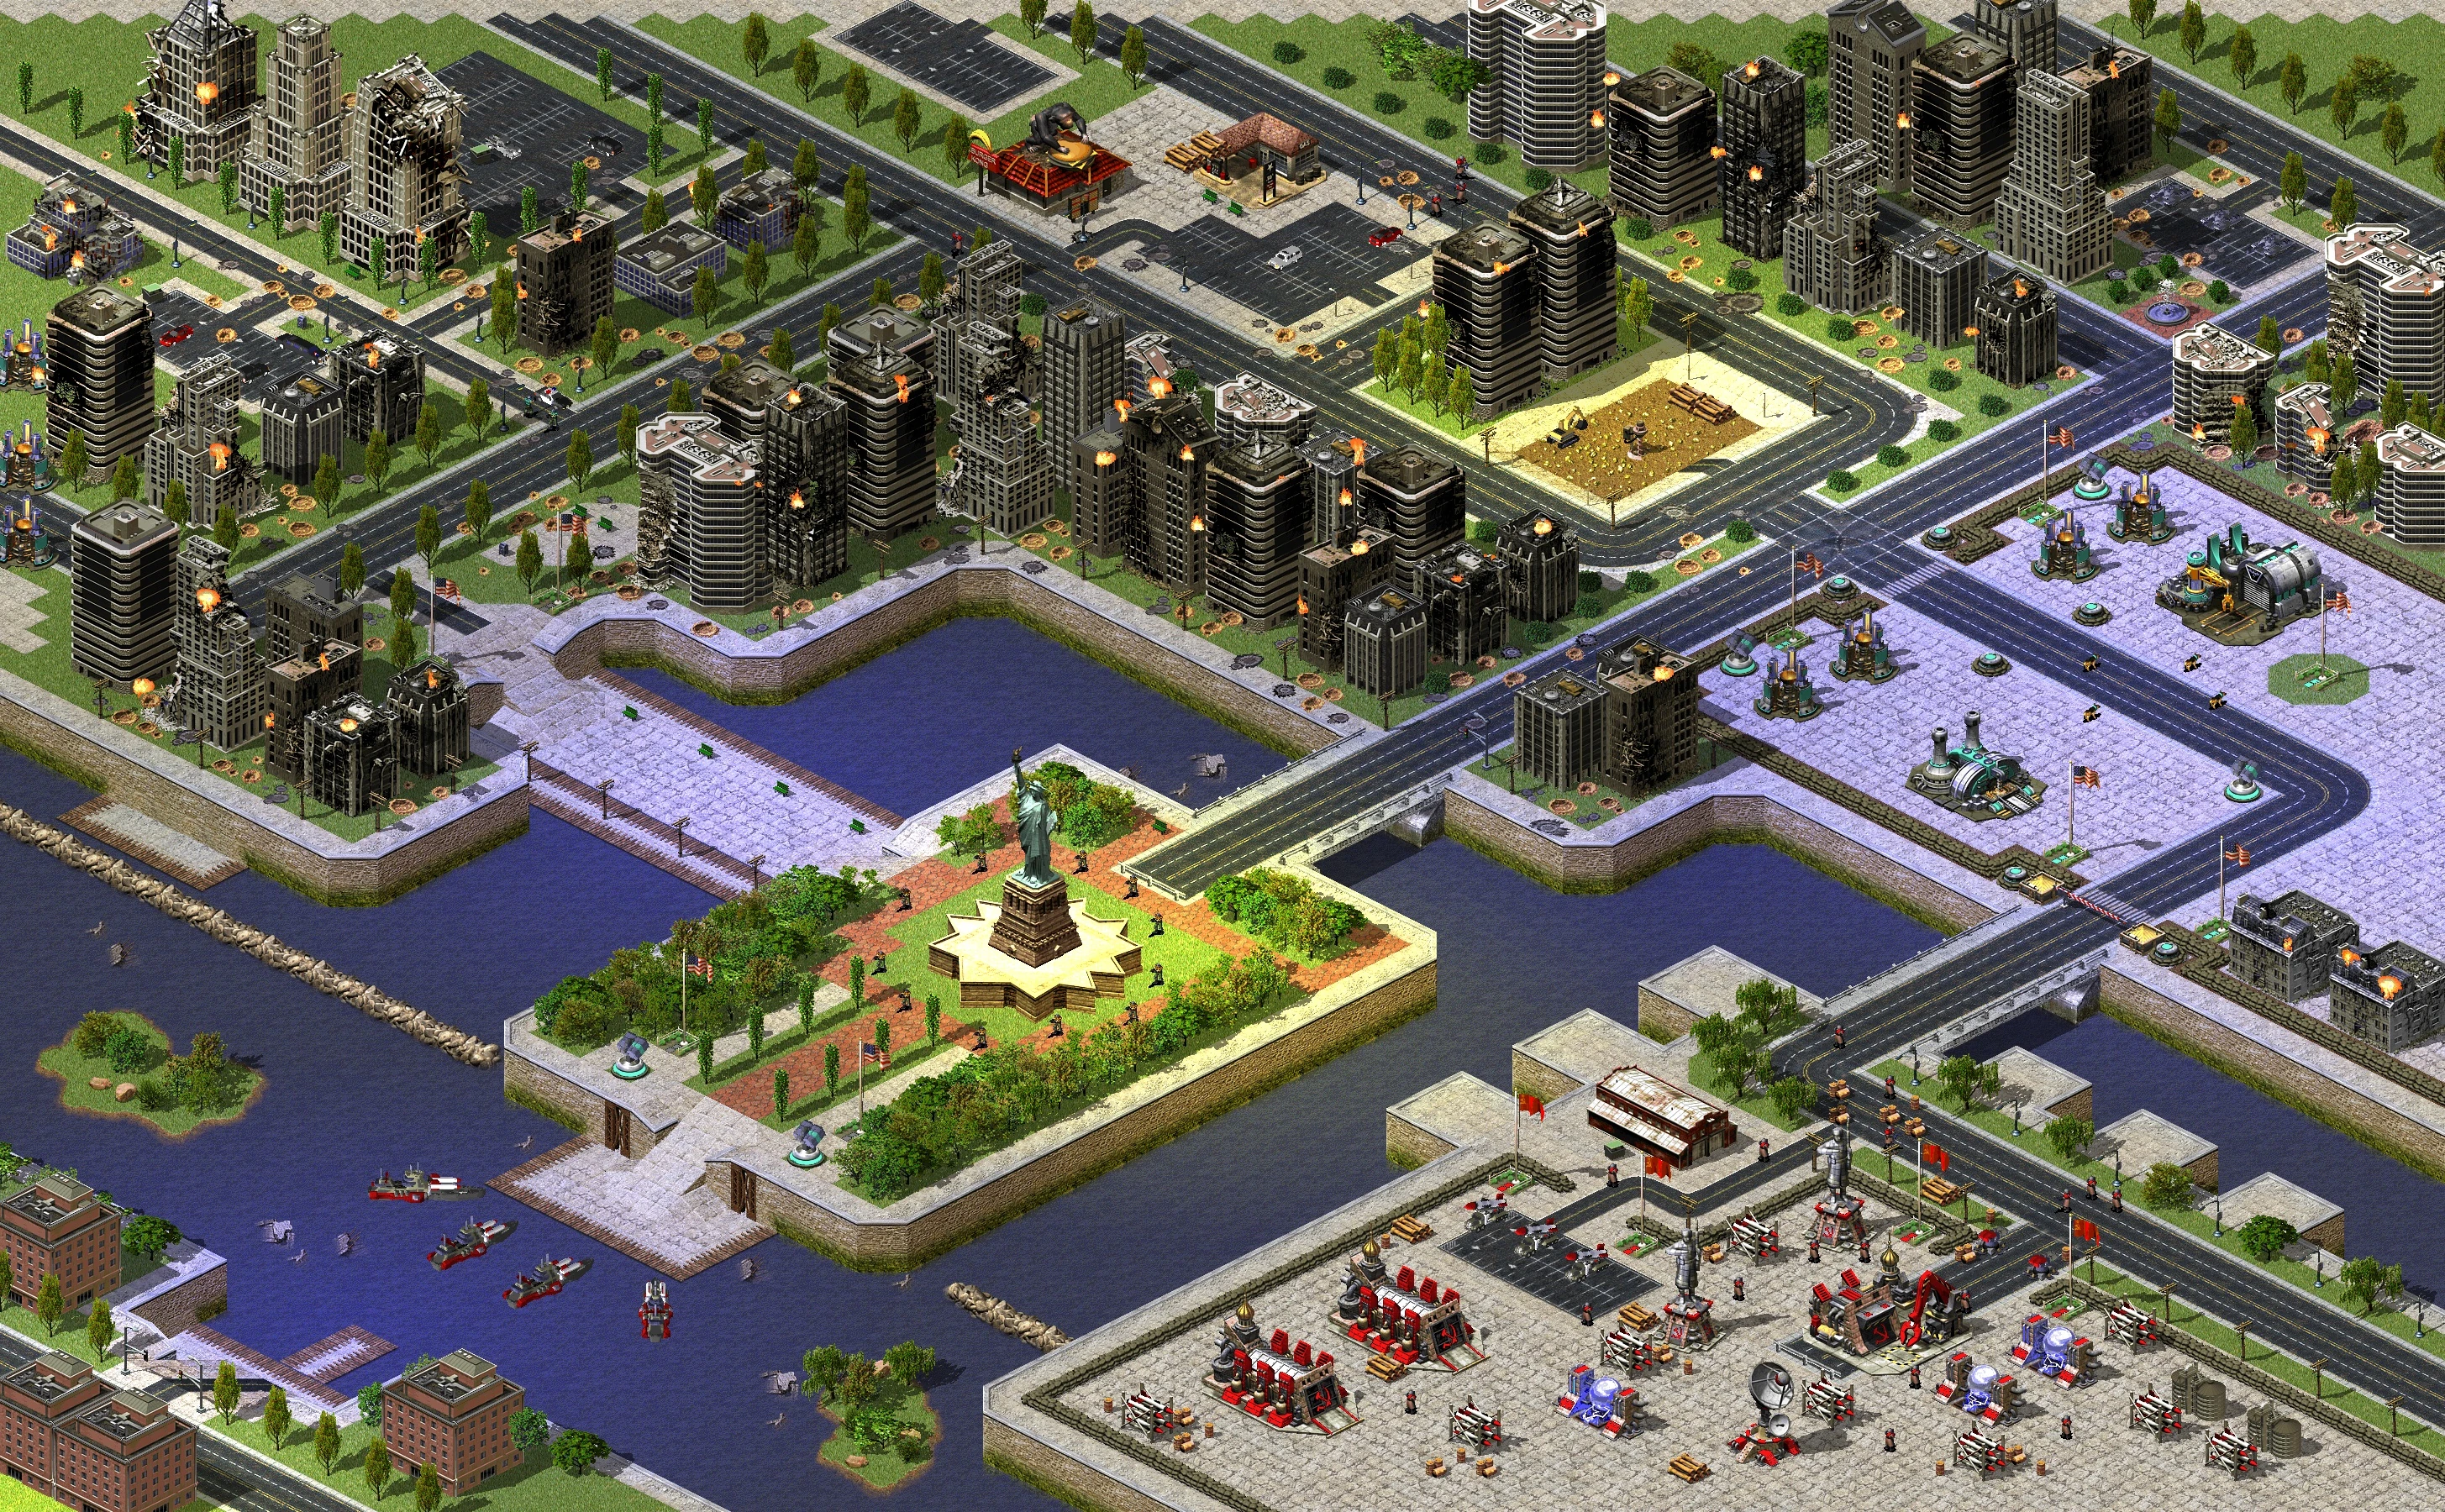
| + | File:RA2A01.jpg|Map panorama |
||
| + | </gallery> |
||
| + | |||
| ⚫ | |||
<center> |
<center> |
||
| − | {{YouTube| |
+ | {{YouTube|Kzpdiv2mSHw|Briefing}} |
| − | {{YouTube| |
+ | {{YouTube|FVfeT6pIAdM|Tanya commenting on Dreadnoughts in the Hudson river}} |
| + | {{YouTube|1lbMUD8MWYc|Romanov's broadcast after the destruction of the Statue of Liberty}} |
||
| + | {{YouTube|-dnQdeVDiS4|Eva after the reclamation of Fort Bradley}} |
||
</center> |
</center> |
||
| − | == |
+ | ==References== |
<references /> |
<references /> |
||
| − | {{ |
+ | {{Red Alert 2 Missions|faction=Allied}} |
Revision as of 23:02, 19 June 2021
| “ | The Soviets have invaded. They outnumber us ten to one. You must assist special agent Tanya in New York. We are marshaling our forces as fast as we can, Commander, but we need time. A small American base, Fort Bradley, is in the New York area. If you can make contact, they may be able to assist in the defense of New York. Tanya will be moving through a chaotic battlefield. Keep your eye out for targets of opportunity and watch for new mission objectives. - Mission briefing |
” |
Operation: Lone Guardian is the first mission of the Allied campaign of Command & Conquer: Red Alert 2.[1]
Background
The Soviet invasion of the American mainland took the USA by surprise but not the European leaders. As Soviet invaders pour into the country from every conceivable direction, the Allied military desperately tried to defend itself from the aggressors. One of the key elements of the invasion was New York City, hit especially hard due to its strong propaganda values.
With most of the military commanders dead, only one was able to respond to the President's Lazarus Protocol, an emergency directive to be activated in the event of an invasion. Coming under the command of General Carville, the Commander was placed in command of every man, woman and child in the Eastern United States and sent to New York City to blunt the Soviet invasion.
Force composition
The Americans were caught off-guard by the invasion, and they only had a small force. Nevertheless, Several Legions of GIs were deployed to Liberty Island, and Fort Bradley was still standing. There were also three Grizzly Tanks nearby, but they had lost contact and were unable to get to Fort Bradley. Despite the small numbers, the Allies also had Special Agent Tanya, giving them a major advantage.
Much of the Soviet invasion force was still on the way, and the Soviets were unable to deploy much of their navy, nor any tanks. However, they had four Dreadnoughts that they were planning to use to provide cover support. They also paradropped legions and legions of Conscripts, commanded by a small supply base in the area. Stationed at the base were also a division of V3 Launchers, inciting panic and wrecking the city.
Key units
| File:RA2 GI Icons.png |
Events
Defending the Statue of Liberty
| “ | The Soviet Navy is attacking the Statue of Liberty! We can't let them get away with that! Sir, is there anything you can do? - Lt. Eva Lee, to the Commander at the start of the mission |
” |
The mission begins with Tanya emerging from her base camp. Once she sinks the four dreadnoughts and the Statue of Liberty is secured, it turns out it wasn't quite safe - A V3 Rocket Launcher brought it down with sustained fire (which was then promptly destroyed by Harriers), after which Premier Alexander Romanov of the Soviet Union and his allies have broadcasted a propaganda statement to American citizens, offering them the choice of either joining the Soviet Revolution, or continue to mourn their past with the ruins of Lady Liberty.
Link up to Fort Bradley
Tanya is then ordered to link up with Fort Bradley. While going through the city, Soviet paratroopers drop in as part of the invasion force took place. Having located scattered Allied units, including deployed GIs and the Grizzly Tank trio, and fighting through numerous Soviet paratroopers, Tanya finally reached Fort Bradley.
Destroying the supply base
An engineer repaired the only accessible bridge to the Soviets' hastily constructed supply base. Using forces from Fort Bradley, Tanya led her infantry across and announced their arrival to the Soviets by destroying the highly unstable oil barrels placed around the base. Bypassing the Sentry Guns, Tanya quickly made short work of the base, while the GIs took out the bombarding V3 Launchers and the Grizzlies taking care of the defences. In no time at all, the Allies had at last blunted the Soviet invasion of New York.
Walkthrough
Since this is the first mission, it is very easy. First, sink the four dreadnoughts with Tanya. Then, enter Liberty Island and quickly kill all conscripts. Then, put Tanya at the Burger McKong car park, so she could destroy all Soviet paratroopers. Then, reach Fort Bradley and build a Barracks. Train a lot of GIs and an engineer. Use the engineer to repair the bridge, then carry out the rest of the assault with GIs.
Valuable assets
- Firepower and armor upgrade crates in parking lots at the upper-left corner of the map.
- Four additional bonus crates located south of said parking lots, located on a small pier and as such, accessible only by Tanya.
- Three experienced Grizzly tanks north of Fort Bradley.
- Multiple crates in the enemy base, including money crate.
Tips
- Statue of Liberty is scripted to withstand dreadnoughts' barrages, so there's no need to sink them hastily. Order Tanya to help the defending veteran GIs to repel conscript paratroopers is recommended since they can be useful to take out Soviet base.
- There's no way to protect Statue of Liberty from being destroyed by the V3 launcher, so sell the two Patriot Missile Systems for credits to assist later war efforts, unless you would rather watch them shoot down the Soviet cargo planes buzzing through the sky during the mission.
- If the Dreadnoughts escape (having attempted to proceed with the mission without destroying them), the mission will fail.
Aftermath
| “ | Your lightning counterattack blunted the Soviet invasion. - The mission debriefing when played faster than at par time |
” |
| “ | You barely succeeded in holding back the Soviet advance. - The mission debriefing when played slower than at par time |
” |
The Allies lightning counterattack blunted the Soviet invasion, protecting the East Coast. However, it was only a minor victory. The Soviets were still churning in from Mexico and the Pacific. Furthermore, the destruction of the Statue of Liberty was a major blow to the Americans. It was only a matter of time until Soviets reached Washington D.C.
Trivia
- In the last Soviet mission of Red Alert 3, Tanya was seen destroying Dreadnoughts attacking the Statue of Liberty, just before the player builds their base.
- The damage the Dreadnoughts’ missiles deal to the Statue of Liberty has been greatly reduced for the purposes of the mission, but not quite completely. If the player leaves the Dreadnoughts long enough then they will destroy the Statue, Eva will announce that a critical structure has been lost and the mission will fail (even though the Statue is ultimately destroyed by the V3 anyway). This is demonstrated here: https://youtu.be/PbEKEtHO6JQ
Gallery

Loading screen
Map panorama
Videos
References
- ↑ Westwood Pacific, Command & Conquer: Red Alert 2. Allied mission 1: "Operation: Lone Guardian".
| ||||||||||||||||||||||||||||||