No edit summary Tag: Source edit |
LaserYoshi (talk | contribs) m (→Background: clean up, replaced: Europe → Europe) |
||
| Line 1: | Line 1: | ||
| − | {{Games| |
+ | {{Games|TS}} |
| + | {{Cleanup|Clear out fanfiction}} |
||
{{WarBox |
{{WarBox |
||
| − | |name = |
+ | |name = Destroy Mammoth Mk. II Prototype |
| − | |prev = |
+ | |prev = |
| + | * [[Protect Waste Convoys]] or |
||
| − | |next = [[Area Fifty-Two]] |
||
| + | * [[Reestablish Nod Presence]] |
||
| ⚫ | |||
| − | | |
+ | |next = [[Capture Jake McNeil]] |
| ⚫ | |||
| − | |imgdesc = {{L|Ranger|Generals}}s paradropping onto the airfield |
||
| + | |imgdesc = Mammoth Mk. II prototype field test |
||
| − | |conflict = [[ |
+ | |conflict = [[Second Tiberium War]] |
| ⚫ | |||
| − | | |
+ | |date = 2030 |
| − | | |
+ | |place = England, [[United Kingdom]] |
| ⚫ | |||
| − | * Iranian oil field captured |
||
| − | |side1 = {{Subfaction| |
+ | |side1 = {{Subfaction|Nod|TS}} |
| − | |side2 = {{Subfaction| |
+ | |side2 = {{Subfaction|GDI|TS}} |
| ⚫ | |||
| − | |goal1 = Capture the oil fields and eliminate the GLA forces |
||
| ⚫ | |||
| − | |goal2 = Repel the American task force |
||
| ⚫ | |||
| ⚫ | |||
| + | * [[Chameleon spy]] |
||
| ⚫ | |||
| + | * [[Mobile construction vehicle (Tiberian Sun)|MCV]] |
||
| ⚫ | |||
| + | * [[Banshee (Tiberian Sun)|Banshees]] |
||
| − | * [[C-130 Hercules]] |
||
| + | |forces2 = |
||
| − | * [[Ranger (Generals)|Rangers]] |
||
| − | * [[ |
+ | * [[Mammoth Mk. II]] |
| + | |game = ''[[Command & Conquer: Tiberian Sun|Tiberian Sun]]'' |
||
| − | US ground forces including: |
||
| + | |objectives = |
||
| − | * [[Burton]] |
||
| + | * Spy on one of the GDI Comm Centers |
||
| − | * [[Avenger]]s |
||
| + | * Destroy the Mammoth Mark II prototype |
||
| − | * [[Crusader tank]]s |
||
| − | * [[Paladin tank]]s |
||
| − | * [[Humvee (Generals)|Humvees]] |
||
| − | * [[Pathfinder]]s |
||
| − | * [[Tomahawk launcher]] |
||
| − | * Three [[CIA agent]]s |
||
| − | |forces2 = GLA garrison forces including a [[SCUD storm (Generals 1)|SCUD storm]] <br/> Civilian militia including: |
||
| − | * [[Angry mob]]s |
||
| − | *Car bombs |
||
| − | * [[Bomb truck]]s |
||
|notes = |
|notes = |
||
| + | |transcript = Transcript:Destroy Mammoth Mk. II Prototype |
||
}} |
}} |
||
| + | {{NonCanonCamp|Nod|TS}} |
||
| − | '''Black Gold''' is the fourth and penultimate mission in the {{L|United States of America|Generals|American}} campaign of {{GL|Zero Hour}}. The main objective was to destroy all GLA forces near the {{L|Tech oil derrick|Generals|oil fields}} in Iran to stop [[Dr. Thrax]]'s funding. Despite heavy resistance from the GLA and their allies from a local town where the GLA used propaganda to incite the civilians fight for them, the operation was a success.<ref name="CCGZH_USA4">Electronic Arts Los Angeles, ''[[Command & Conquer: Generals - Zero Hour]]''. USA mission 4: "Black Gold".</ref> |
||
| + | {{Quote|I want you to destroy the Mammoth prototype GDI has constructed. They are praying that it's their salvation. Remind them whose side the gods are on.|[[Kane]]}} |
||
| + | '''Destroy Mammoth Mk. II Prototype''' is the tenth [[Nod]] mission of ''[[Command & Conquer: Tiberian Sun|Tiberian Sun]]''. |
||
| − | == |
+ | ==CABAL briefing== |
| + | GDI is set to test the prototype of their new weapon, the [[Mammoth Mk. II|Mammoth Mark II]]. It is vital that we sabotage their production of this monster as soon as possible. Before we can do that however, we need to know where the test is being held. Send a [[Chameleon spy|Chameleon Spy]] into one of the [[Upgrade center|Radar Facilities]]. The coordinates to the testing ground should be stored there. Be careful of the patrols in the area - we have only one spy available. Once we have the location of the test, construct a base and destroy the prototype. You now have access to the new [[Banshee (Tiberian Sun)|Banshee]] aircraft, which should prove useful. Destroying the remainder of the GDI base is at your discretion, but the Mammoth MUST be destroyed. |
||
| − | Following the assault and capture of a secret GLA lab, the American forces learned that the GLA, led by a general codenamed "Dr. Thrax", are engaging in the production of lethal toxin. American intelligence agency traced Thrax's funding to an Iranian oil fields, and the US military intended to cripple the GLA threat by cutting off their funding. |
||
| + | * Objective One: Spy on one of the GDI Comm Centers. |
||
| − | The area surrounding the oil fields was hostile as the GLA had the support of the disenchanted civilians in the local town. In preparation for the mission, three [[CIA agent]]s were inserted into the area to find out the resistance and situation. A night operation was planned to catch the GLA off guard. |
||
| + | * Objective Two: Destroy the Mammoth Mark II prototype. |
||
| − | == |
+ | ==Background== |
| + | [[File:Nod10-Denmark_Path.png|thumb|left|(This map depicts the Denmark path)]] |
||
| − | === Airborne Assault === |
||
| + | With Europe now under threat of being terraformed by Nod's chemical missiles and GDI forces on the run, the Brotherhood now turned their attention to GDI's [[Hammerfest]] base in Norway, location of their European central command. Its defenses however were very strong and capable of withstanding even Nod's new [[chemical missile]]. |
||
| − | The only way to establish a foothold in the area was by air, and capturing the town's airport would be beneficial to the Americans so they could be supplied with reinforcements. Under cover of darkness, US [[Ranger (Generals)|Rangers]] paradropped onto the airfield and eliminated the AA batteries and other GLA units present there. Once all GLA units were destroyed, an American plane landed several Crusader tanks, Humvees and [[dozers]] to establish a base of operations at the airport. Colonel Burton and six Pathfinders were also dropped off by a Chinook helicopter. |
||
| + | But the GDI would soon be able to deploy a powerful new weapon of their own in order to counter Nod's recent gains. It was thus imperative that whatever the cost the deployment of this weapon be at least delayed. They could not afford to fail. |
||
| − | === Neutralizing Local Resistance === |
||
| − | With only a limited number of supply piles in the area, it was essential for the American forces to capture some of the [[oil derricks]] that were controlled by the GLA. All the oil derricks in the area were controlled by the GLA and could continually build up their attack forces in a war of attrition against the Americans. After removing several booby traps, Rangers captured the oil derricks at the airport to secure the funds needed while the rest of the force set up defensive positions at the access bridges. |
||
| + | ===Mammoth Mk. II=== |
||
| − | Unfortunately the GLA used the radio station to rally the locals against the US forces. The [[Angry Mob]]s were the least of the Americans' worries, as car bombs and [[Bomb Truck]]s tore up the US forces while the GLA besieged the American base. Without any air support apart from their [[A-10 strike|A-10s]], the Americans sent an infantry armored division to destroy the local radio station. Local resistance and a few GLA tanks defended the radio station, which itself was heavily armoured. In the process, two of the CIA agents was found in the town by the US forces and fought alongside the group against the GLA. The Americans soon freed the locals from GLA propaganda but a flood of [[rebel]]s came pouring into the town, forcing the US forces to fight off the reinforcements until the town was secured. |
||
| + | [[Great Britain]] was a natural island fortress and as it had considerable scientific expertise along with having a long history of being securely under GDI control it was a logical location for the GDI to finally conduct the development of a replacement for the [[Mammoth Mk. I]]; except that this new Mammoth 'tank' wasn't a tank at all but a massive four-legged walker. |
||
| + | Upon Nod's discovery of GDI's new weapon, [[Anton Slavik|Slavik]] sent his forces to England and personally saw to it that the new weapon was destroyed. Nod did not believe of course that this would permanently put an end to the threat the new walker would pose to their plans, only delay its mass-production long enough for them to be in a stronger position to deal with it. |
||
| − | === Securing the Oil Derricks === |
||
| − | Although the oil derricks at the airport was in US hands, the rest were controlled by the GLA which constantly brought out its war machine and battered the American defenses. Using their attack group that recently assaulted the radio station the Americans sent that group to fight their way to the other side of the oil fields, while the Rangers captured the GLA oil derricks left intact by the US attack force. Desperate to stop the US from capturing the oil fields, the GLA constructed their [[SCUD storm (Generals 1)|SCUD storm]] in an attempt to destroy the derricks and the attacking US division. But slowly the Americans fought their way through heavy GLA opposition, with help from Colonel Burton and the third CIA agent found hiding near the oil field, after a long battle the US captures all of the oil derricks, crippling the GLA's main source of funding. |
||
| − | == |
+ | ==Destroying the Prototype== |
| + | ===The Banshee=== |
||
| − | Without their funding the GLA war machine grounded to a halt. This time the Americans reinforced their attack force and blasted their way through one of the base positions, all of which were heavily mined by [[Demo Trap]]s. A massive engagement occurred between the Americans and the GLA defenders but they were not enough to halt the advancing Americans from destroying their base. |
||
| + | Fortunately for Nod; production had just begun of a new weapon of Nod's own, an aircraft. The first of these Banshee attack fighters were placed at Slavik's disposal for the purpose of the Mammoth Mk. II's destruction and of any GDI forces that might get in the way of it. These new aircraft were based upon designs decoded from the [[Tacitus]] and were judged to be more than a match for the Mammoth Mk. II, despite its inbuilt air defenses. |
||
| + | ===Locating the Mammoth Mk II=== |
||
| ⚫ | |||
| + | {{Quote|The MM2 is quite effective against structures.'' |
||
| − | The destruction of the GLA garrison guarding the oil fields, as well as the American capture and self-destruction of the oil rigs, severely crippled Dr. Thrax's war effort to fight the Americans. US intel finally located the GLA leader at a classified area in the Middle East. Dr. Thrax's defeat there would plunge the whole GLA into turmoil again. |
||
| + | ''Now watch the effectiveness against ground units.'' |
||
| − | == Walkthrough == |
||
| − | Once you secure the strip, use the Dozers to neutralize Booby and Demo Traps scattered on your base. Then build defenses on the 3 bridges, especially in the Northern side, because that bridge will be the most used by GLA to attack you. |
||
| + | ''The MM2 is equally deadly to air-based assaults.'' |
||
| − | While at it, capture the Oil Derricks and build a force of Paladins and Humvees with Pathfinders and Missile Defenders to secure the rest of the bridges. Capture the Derricks after neutralizing it. Expect heavy resistance by enemies. Capture the Tech Oil Refinery and the Artillery Platforms, adding it with building Fire Bases to soften GLA positions. |
||
| + | ''This concludes the Mammoth Mark II demonstration.''|Full transcription of the Mammoth test.}} |
||
| − | As you do it, use Burton to soften the Radio Station defenders and use A-10 Strikes to eliminate GLA the radio station to stop further suicide attacks launched. |
||
| + | Nod first needed to locate exactly where the testing site of the Mammoth walker was before deploying their strike force. A [[chameleon spy]] was therefore deployed to infiltrate one of GDI's three comm centers that were scattered in the region in order to locate the site. The spy quickly made his way north over the bridge, evading GDI patrols along the way. |
||
| − | After that, secure the village by putting defenses on the area. After that, find and secure 3 [[CIA agent]]s on the field: one is near the oil field, the second is on the boundary between the oil fields and the village, and the last is on the village's outskirts. |
||
| + | A short while later the spy came across a GDI comm center and infiltrated it. He hacked into the networks and located the testing site, allowing Nod to quietly observe the power of the new Mammoth weapon. The new weapon was demonstrated to decimate derelict GDI vehicles with one shot of its [[railguns]] and quickly shoot down a remote-controlled [[Orca fighter]] with the use of its SAM batteries. The walker also made short work of some of the abandoned civilian buildings on site, concluding the testing phase. |
||
| − | Use Spy Sat uplink to clear Demo Traps in the road to the GLA base. Then eliminate the GLA to the roots. |
||
| − | === |
+ | ===Nod Arrival=== |
| + | Now knowing for sure the location of the prototype, Nod forces arrived in the area, quickly established a base and began to engage the GDI forces openly. Now the GDI were alerted to the Nod presence they started to attack the Nod base, while the Mammoth walker retreated from the testing area to a secure site defended by many [[Surface-to-air missile site (Tiberian Sun)|SAM sites]]. Fortunately for Nod, their Banshee aircraft were now able to be deployed and could now demonstrate their own power by staging hit-and-run assaults on GDI patrols and attackers. |
||
| − | * On medium and hard difficulties, the GLA base has a SCUD storm already built, (there is none on easy), but it won't activate unless Spy Satellite is used on the base. Since the GLA won't repair or rebuild their structures, wait until you've ranked up to level 3 A-10 Strike before revealing the base, in which you'll be able to safely destroy the SCUD storm with 2 A-10 Strikes before they can launch. |
||
| − | * There are three [[CIA agent|CIA Agents]] around the map. Find them to solicit their help, but be careful not to run the vehicle over the Agent before they identified themselves to be ally, as the vehicle may kill them. |
||
| − | * Due to the amount of Oil Derricks in this mission, the Derrick pays $100 each time as opposed to $200 in other mission or in regular gameplay. The $1000 bonus on capture remains the same, however. |
||
| − | * The initial attack force's fate is unknown after securing the area. |
||
| + | ===Destruction of the Mammoth Walker=== |
||
| ⚫ | |||
| + | Nod finally located the Mammoth walker prototype hiding deep inside the GDI testing base. There were essentially two ways they could have eliminated it. They could have either have deployed their Banshee fighters to eliminate it from the air, bypassing the base (as Kane had planned). This tactic would have required that they eliminate the [[Surface-to-air missile site (Tiberian Sun)|SAM sites]] beforehand unless they had great numbers and were prepared to take serious losses. |
||
| + | |||
| + | Alternatively they could have used more traditional ground forces to launch an assault on the base and having broken through its defenses they could have engaged the walker with a massed ground assault or in a hybrid manner they could have destroyed the base's [[Surface-to-air missile site (Tiberian Sun)|SAM sites]] with ground forces and then cut their losses by using a mass Banshee strike on the walker itself. |
||
| + | |||
| + | But regardless of how it was done and at what cost, Nod were indeed able to destroy the Mammoth Mk. II prototype as they had planned, striking a great blow to the GDI. |
||
| + | |||
| ⚫ | |||
| + | [[File:Nod11-Denmark_Path.png|thumb|left|200px|Nod turns their attention to Hammerfest]] |
||
| + | The destruction of the Mammoth Mk. II prototype and the occupation of the area by Nod forces delayed the production of the vehicle. However, GDI would still later deploy the Mammoth Mk. II in the defense of Hammerfest. |
||
| + | |||
| + | {{Clear Left}} |
||
| + | ==Notes== |
||
| + | * The briefing text mentions that the player must send a Chameleon Spy into a Radar Facility, when the mission actually requires the unit to be sent into one of the three Upgrade Centers rather than a [[Radar (Tiberian Sun)|Radar Station]]. |
||
| + | |||
| ⚫ | |||
| + | <gallery> |
||
| + | TSN11.jpg|Map panorama |
||
| + | </gallery> |
||
| + | |||
| + | ==Videos== |
||
<center> |
<center> |
||
| − | {{YouTube| |
+ | {{YouTube|RX8TNhzhCMA|Briefing}} |
| + | {{YouTube|jz3pFI7rmoY|Banshees disabling a Mammoth Mk. II (mission accomplished cinematic)}} |
||
| − | {{YouTube|HJun_2_QtWY|Mission walkthrough}} |
||
</center> |
</center> |
||
| + | {{Tiberian Sun Missions|faction=Nod}} |
||
| − | == References == |
||
| − | <references /> |
||
| − | {{Generals Missions|game=Zero Hour|faction=American}} |
||
Latest revision as of 01:01, 26 December 2023
|
The damage is too extensive!
Destroy Mammoth Mk. II Prototype has been marked for cleanup. Reason(s):
Clear out fanfiction |
| The following is based on the Nod campaign of Tiberian Sun and might contradict canon. |
| “ | I want you to destroy the Mammoth prototype GDI has constructed. They are praying that it's their salvation. Remind them whose side the gods are on. - Kane |
” |
Destroy Mammoth Mk. II Prototype is the tenth Nod mission of Tiberian Sun.
CABAL briefing
GDI is set to test the prototype of their new weapon, the Mammoth Mark II. It is vital that we sabotage their production of this monster as soon as possible. Before we can do that however, we need to know where the test is being held. Send a Chameleon Spy into one of the Radar Facilities. The coordinates to the testing ground should be stored there. Be careful of the patrols in the area - we have only one spy available. Once we have the location of the test, construct a base and destroy the prototype. You now have access to the new Banshee aircraft, which should prove useful. Destroying the remainder of the GDI base is at your discretion, but the Mammoth MUST be destroyed.
- Objective One: Spy on one of the GDI Comm Centers.
- Objective Two: Destroy the Mammoth Mark II prototype.
Background
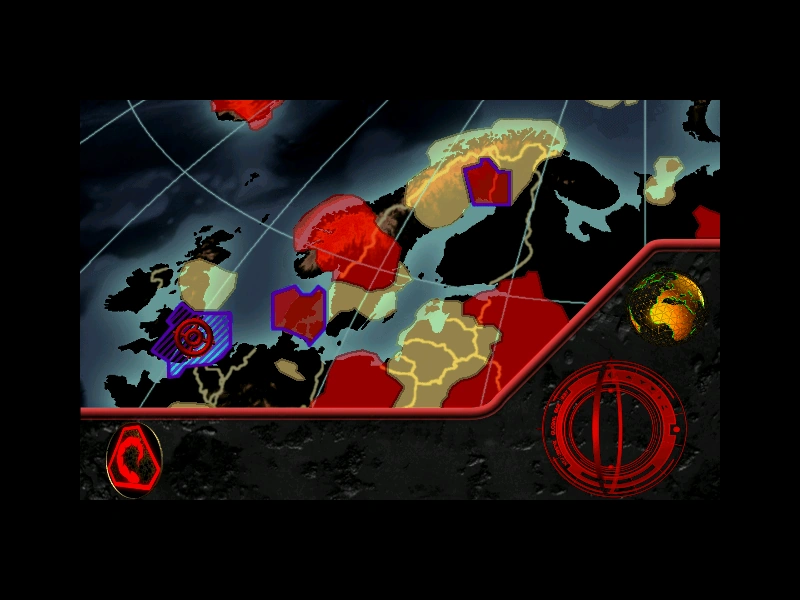

(This map depicts the Denmark path)
With Europe now under threat of being terraformed by Nod's chemical missiles and GDI forces on the run, the Brotherhood now turned their attention to GDI's Hammerfest base in Norway, location of their European central command. Its defenses however were very strong and capable of withstanding even Nod's new chemical missile.
But the GDI would soon be able to deploy a powerful new weapon of their own in order to counter Nod's recent gains. It was thus imperative that whatever the cost the deployment of this weapon be at least delayed. They could not afford to fail.
Mammoth Mk. II
Great Britain was a natural island fortress and as it had considerable scientific expertise along with having a long history of being securely under GDI control it was a logical location for the GDI to finally conduct the development of a replacement for the Mammoth Mk. I; except that this new Mammoth 'tank' wasn't a tank at all but a massive four-legged walker.
Upon Nod's discovery of GDI's new weapon, Slavik sent his forces to England and personally saw to it that the new weapon was destroyed. Nod did not believe of course that this would permanently put an end to the threat the new walker would pose to their plans, only delay its mass-production long enough for them to be in a stronger position to deal with it.
Destroying the Prototype
The Banshee
Fortunately for Nod; production had just begun of a new weapon of Nod's own, an aircraft. The first of these Banshee attack fighters were placed at Slavik's disposal for the purpose of the Mammoth Mk. II's destruction and of any GDI forces that might get in the way of it. These new aircraft were based upon designs decoded from the Tacitus and were judged to be more than a match for the Mammoth Mk. II, despite its inbuilt air defenses.
Locating the Mammoth Mk II
| “ | The MM2 is quite effective against structures.
Now watch the effectiveness against ground units. The MM2 is equally deadly to air-based assaults. This concludes the Mammoth Mark II demonstration.'' |
” |
Nod first needed to locate exactly where the testing site of the Mammoth walker was before deploying their strike force. A chameleon spy was therefore deployed to infiltrate one of GDI's three comm centers that were scattered in the region in order to locate the site. The spy quickly made his way north over the bridge, evading GDI patrols along the way.
A short while later the spy came across a GDI comm center and infiltrated it. He hacked into the networks and located the testing site, allowing Nod to quietly observe the power of the new Mammoth weapon. The new weapon was demonstrated to decimate derelict GDI vehicles with one shot of its railguns and quickly shoot down a remote-controlled Orca fighter with the use of its SAM batteries. The walker also made short work of some of the abandoned civilian buildings on site, concluding the testing phase.
Nod Arrival
Now knowing for sure the location of the prototype, Nod forces arrived in the area, quickly established a base and began to engage the GDI forces openly. Now the GDI were alerted to the Nod presence they started to attack the Nod base, while the Mammoth walker retreated from the testing area to a secure site defended by many SAM sites. Fortunately for Nod, their Banshee aircraft were now able to be deployed and could now demonstrate their own power by staging hit-and-run assaults on GDI patrols and attackers.
Destruction of the Mammoth Walker
Nod finally located the Mammoth walker prototype hiding deep inside the GDI testing base. There were essentially two ways they could have eliminated it. They could have either have deployed their Banshee fighters to eliminate it from the air, bypassing the base (as Kane had planned). This tactic would have required that they eliminate the SAM sites beforehand unless they had great numbers and were prepared to take serious losses.
Alternatively they could have used more traditional ground forces to launch an assault on the base and having broken through its defenses they could have engaged the walker with a massed ground assault or in a hybrid manner they could have destroyed the base's SAM sites with ground forces and then cut their losses by using a mass Banshee strike on the walker itself.
But regardless of how it was done and at what cost, Nod were indeed able to destroy the Mammoth Mk. II prototype as they had planned, striking a great blow to the GDI.
Aftermath
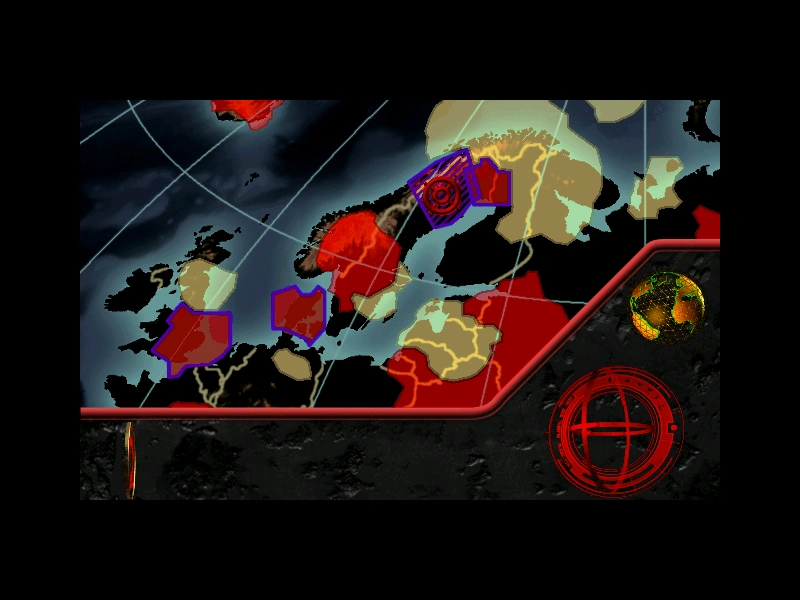

Nod turns their attention to Hammerfest
The destruction of the Mammoth Mk. II prototype and the occupation of the area by Nod forces delayed the production of the vehicle. However, GDI would still later deploy the Mammoth Mk. II in the defense of Hammerfest.
Notes
- The briefing text mentions that the player must send a Chameleon Spy into a Radar Facility, when the mission actually requires the unit to be sent into one of the three Upgrade Centers rather than a Radar Station.
Gallery

Map panorama
